Building Typetura.com
Typetura.js makes it easy to design with fluid typography, but it still requires knowledge of code. We built Typetura.com in order to reach all designers and to ensure those designers have the tools to communicate fluid typography with their teams. But while Typetura.com is a highly interactive and visual tool, it also writes CSS for Typetura.js.
Before structuring the user interface, there was quite a bit of information that we needed. For applications with lots of interactions, I like to start with a Data-Driven-UI (DDUI) approach. DDUI is the process of designing and structuring the different pieces of data that you'll need prior to building. There’s a lot of moving pieces here. In Typetura.com, when you edit the values on the left and the article content in the middle, the CSS Code in the bottom left needs to react to those changes. From a user experience, it’s a pretty seamless flow, but from a building out perspective it can seem difficult to do because there’s a lot to manage. The DDUI process forces us to build from the data design process instead of focusing on the end product. You start by focusing on one piece of functionality, and break that into a data structure. Then you shift to focus on another piece of functionality and break that down. Rinse and repeat this process. As you start to collect more data, you’ll start to find patterns and correlations. This helps you refactor and refine your data models.
Breaking Down the Design
The main piece of functionality that we needed in Typetura.com was the ability to track the modified values in the sidebar. The sidebar is composed of 2 different components: the selector dropdown and the values on any particular breakpoint. We wanted to persist this state so the code can reference itself, jumping back and viewing any breakpoint where the values were modified.

To let the User take full advantage of using the fluid type settings that they’ve configured into their website, we wanted to generate the CSS in the bottom left corner any time values were modified in the sidebar.
Using the DDUI method, we work our way backwards from the problem and know that any interpolable value in the sidebar needs to correspond to its element at a specific breakpoint. We also know that we are only viewing one breakpoint and one element at any given time. As a result, if we build an object that stores the modified properties in a breakpoint » element » properties tree like structure, we can then later traverse the object to show any modified values in the selected breakpoint & element.
In order to output CSS, we take the breakpoint » element » property and convert it to element » keyframe » property. In that structure, we already know what the element is, but the keyframe has to be calculated from the breakpoint, and the data structure has to be inverted to accommodate the Typetura.js output.
Typetura.js uses the CSS output to apply styles. These styles are calculated based on the set maximum width (our default is 1600px), which need to be translated to percentages. Since we predetermine the maximum width, we can store the breakpoint in pixels rather than the percentages. We can do this because our formula for generating the percentage for typetura.js to use is breakpointPixel / maximumWidth. This conversion allows designers to work with a familiar unit of measure, pixels, without having to do the math on the fly.
For the non-interpolable values, we want to persist them globally across breakpoints so that our tree structure looks like element » properties.
Bringing this all together we create an object structure like this:
const state = {
  interpolableValues: {
    "400px": {
      p: {
        padding: "100px",
        margin: "500px"
      }
    },
    "500px": {
      p: {
        margin: "10px"
      }
    },
    "3px": {
      p: {
        "line-height": "10px"
      }
    }
  },
  nonInterpolableValues: {
    h2: {'font-weight': "300"},
    h5: {'font-weight': "bold"},
  },
  selectedBreakpoint: "400px",
  selectedElement: "p"
};
From there, we can build a small translation layer that converts the above values into the format that Typetura.js expects.
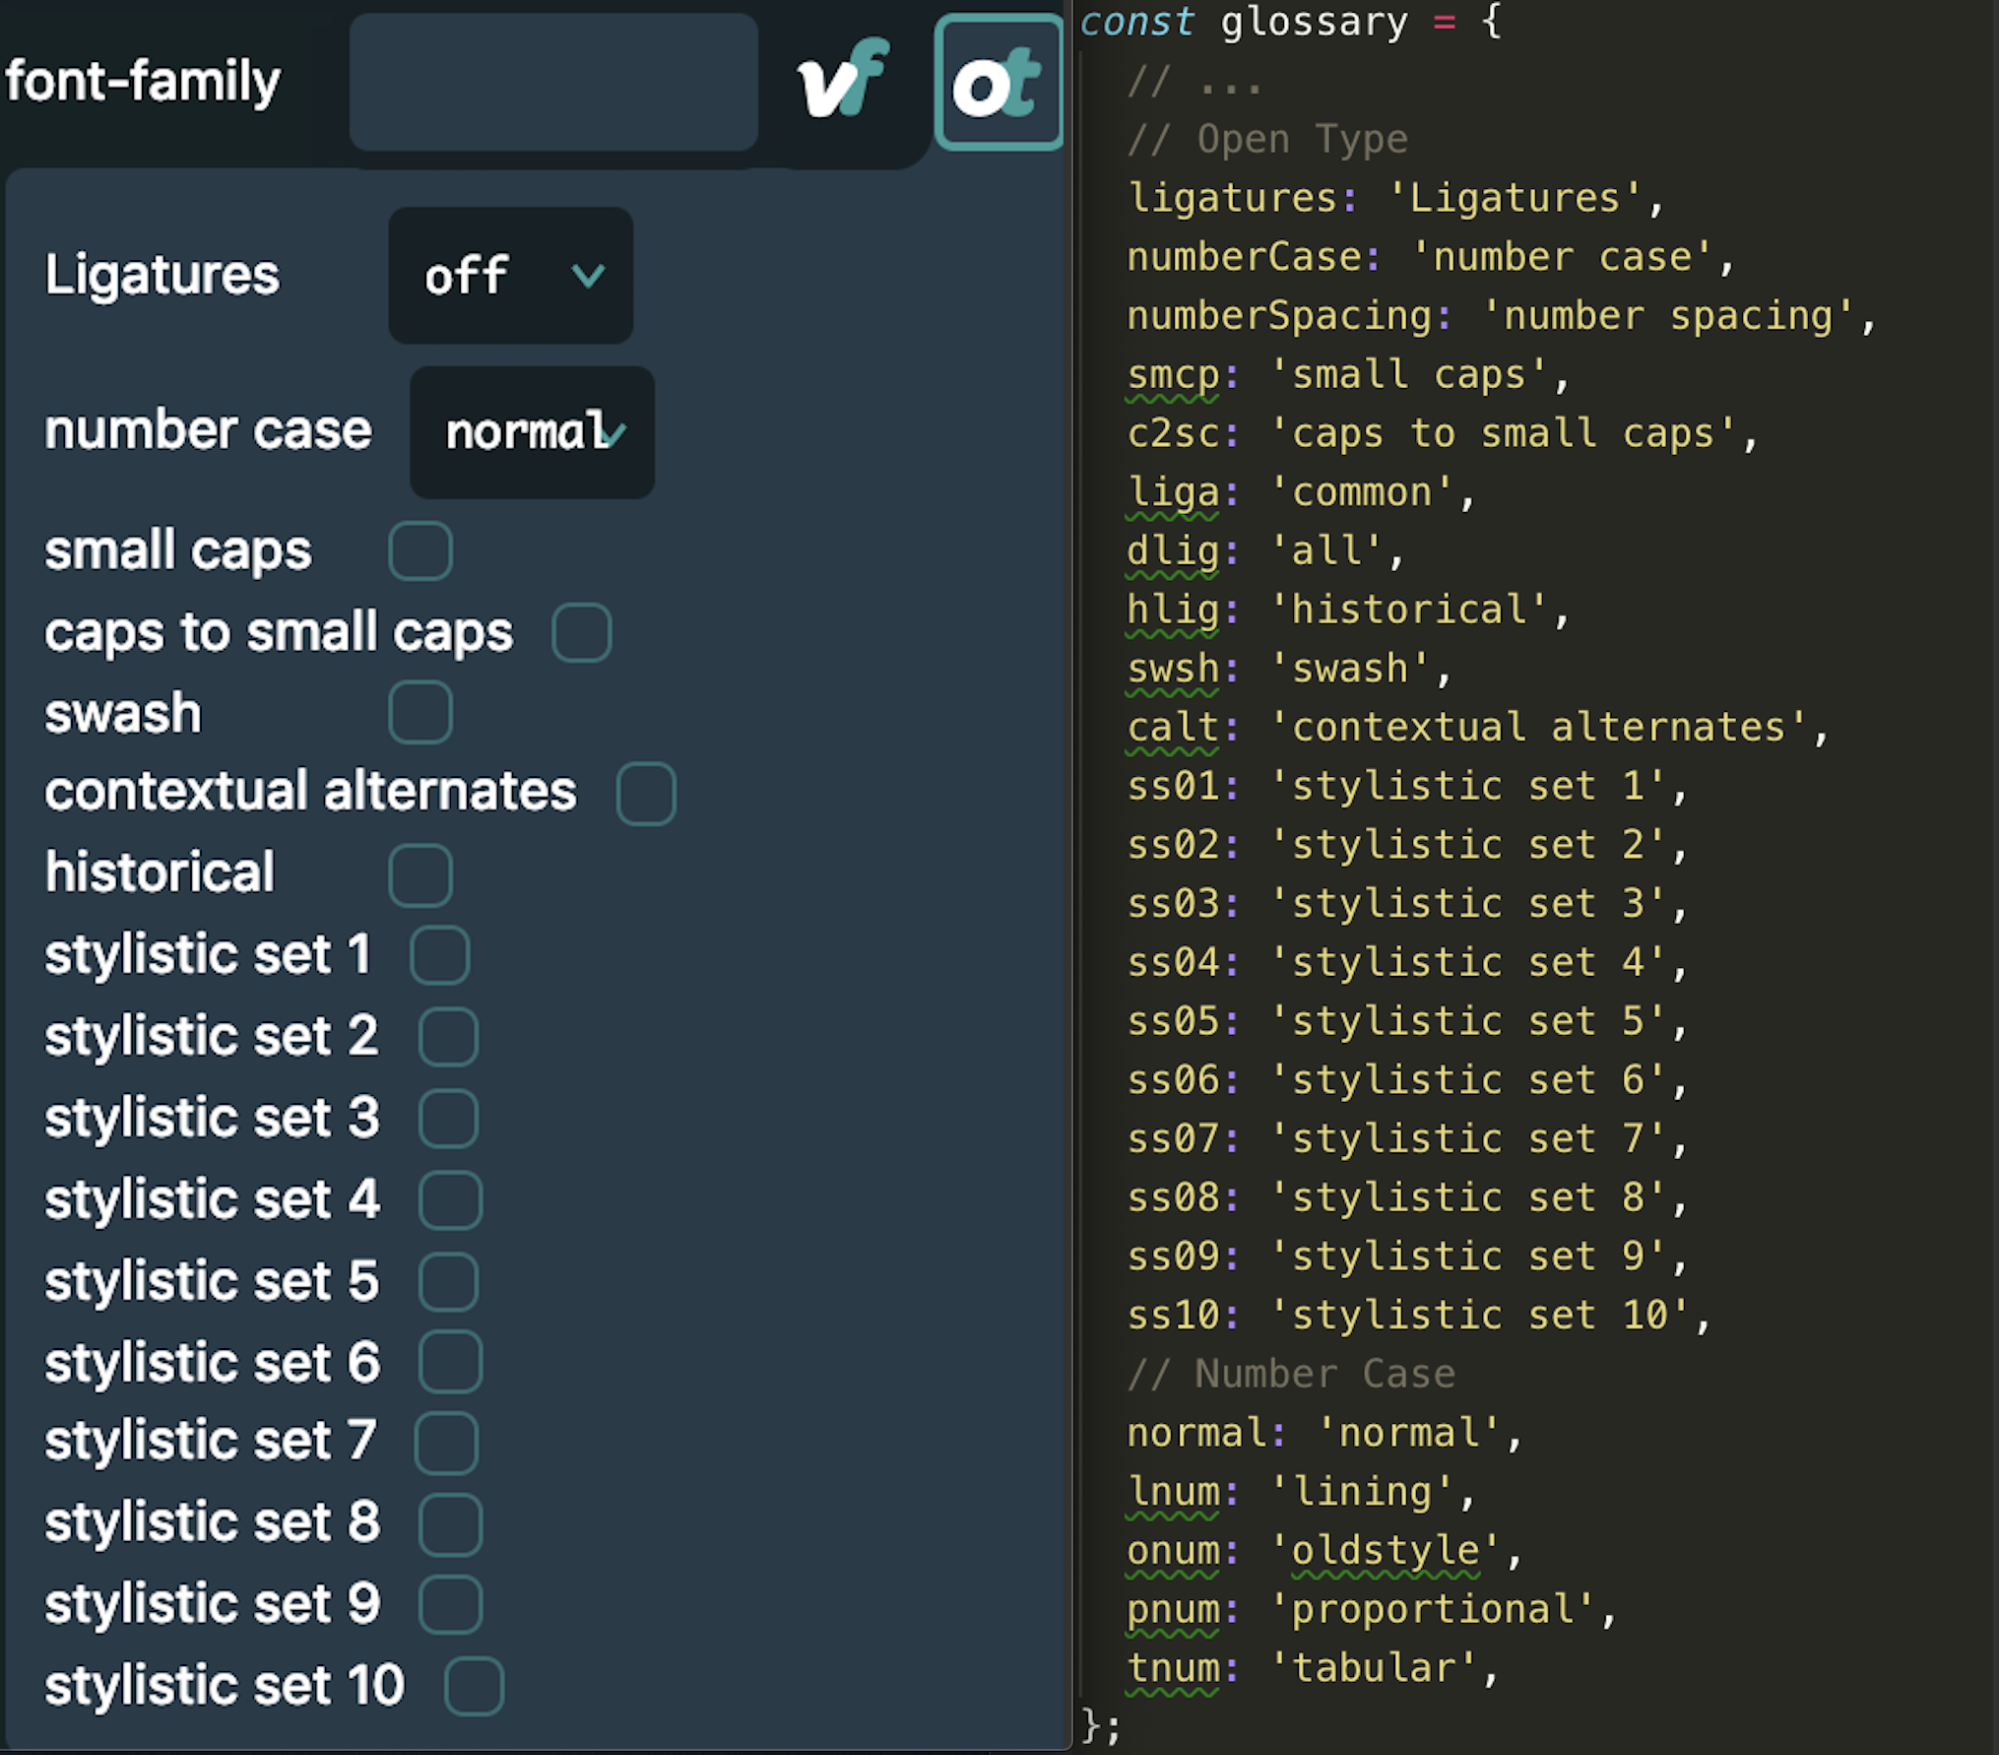
Throughout the app, we want to display human-readable text instead of the elements such as paragraphs, div, h1, etc. because human-readable text provides a better user experience. Rather than putting a whole bunch of if statements throughout the app, we created a glossary object that maps the elements to their human-readable text.
const glossary = {
  // Elements
  article: 'Article',
  p: 'Paragraph',
  h1: 'heading 1',
  h2: 'heading 2',
  h3: 'heading 3',
  h4: 'heading 4',
  h5: 'heading 5',
  h6: 'heading 6',
  ul: 'unordered list',
  ol: 'ordered list',
  li: 'list item',
  blockquote: 'blockquote',
  // Properties
  'max-width': 'max width',
  padding: 'padding',
  margin: 'margin',
  'font-size': 'font size',
  // ...
}
Whenever we need to display some code in human-readable text, we get it from this object. This design lets us iterate pretty quickly because we are able to contain all the text logic in one place and not have a whole bunch of if statements scattered throughout the code base.
Keeping the text close to the code made it easy to work with. At that point it’s just debugging code! Here, we only showed a snippet of the glossary, but we encourage you look at the variable font and opentype panels to see how simple it is with this design.
Translating Typetura.com data model to Typetura.js
With the data model shown in Image 3, we need to convert it into something typetura.js can consume. Typetura.js expects a “@keyframes + element » percentage(s) » propertie(s)” structure. To get there, we need to convert our interpolableValues object resemble the typetura.js format more. So we iterate over each breakpoint in the object and each element in the breakpoint and store the element as the root level. We then contain the breakpoints converted to percentages within.
const typeturaJSFormat = {
  p: {
    0.001875: {
      "line-height": "10px"
    },
    25: {
      padding: "100px",
      margin: "500px"
    },
    35: {
      margin: "10px"
    }
  }
}
We get something that looks like the above. From here, we iterate over this object to create a string that resembles the CSS.
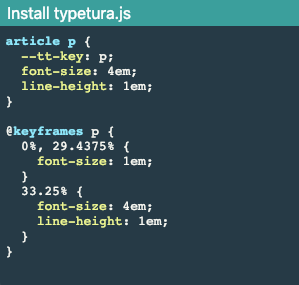
`article p {
    --t-key: p;
    margin: 10px
  }

  @keyframes p {
    0%, 0.001875% {
      line-height: 3px;
    }
    25% {
      line-height: 3px;
    }
    35% {
      margin: 500px;
    }
  }`
Our string looks like this. From here, we inject this into a style tag and insert it into the DOM for Typetura.js. Then we pass this into the react-highlight component to neatly display the code.
Content Editable
In addition to all of this, we also want to be able to edit the content and let the user specify the element they want to use. Luckily, the web has something called contenteditable. While it’s great out of the box, we faced some challenges with it in development. Contenteditable would create paragraph tags in the ul and ol elements whenever a user hit “enter”. These elements didn’t have simple onChange, onKeyDown, onBlur, event listeners like an input tag. It was also difficult to make sure the cursor/caret didn’t jump forward when typing. To solve these contenteditable problems, we found a nice react wrapper, react-contenteditable by Ophir LOJKINE. It provides a nice input-like API. This made us feel right at home because it was like working with a regular input tag. From there we could focus on building the functionality for the content to respond with our sidebar, style the onBlurs & active states, and tabbing around.
In conclusion
To summarize, DDUI helps us break down complicated UIs: designs can be hard when our data is all over the place. However, when we focus on the data structure then the problem becomes the more simple one of just managing state to reflect interactions.